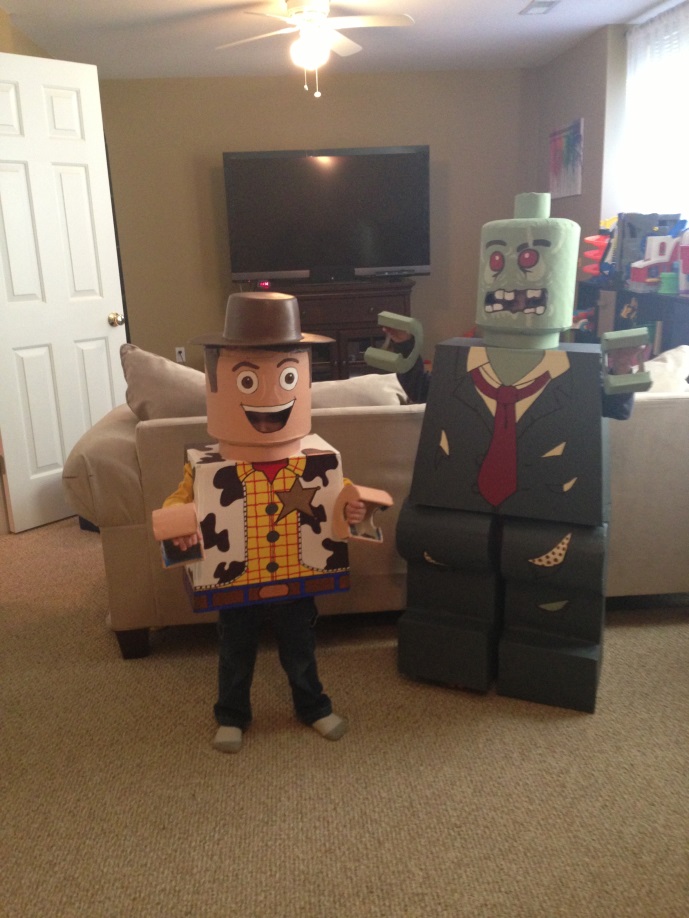
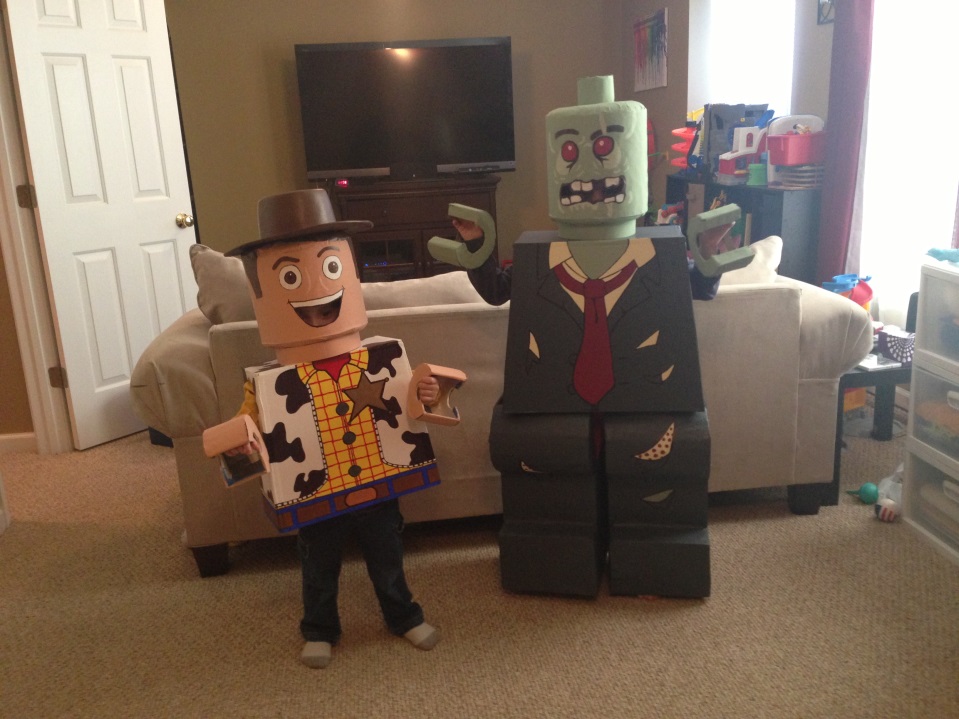
Lego Costume Hands
Materials:
-Cardboard or Foam Board
-Duct Tape
-Painters Tape
-Brown Butcher Paper
-Paint
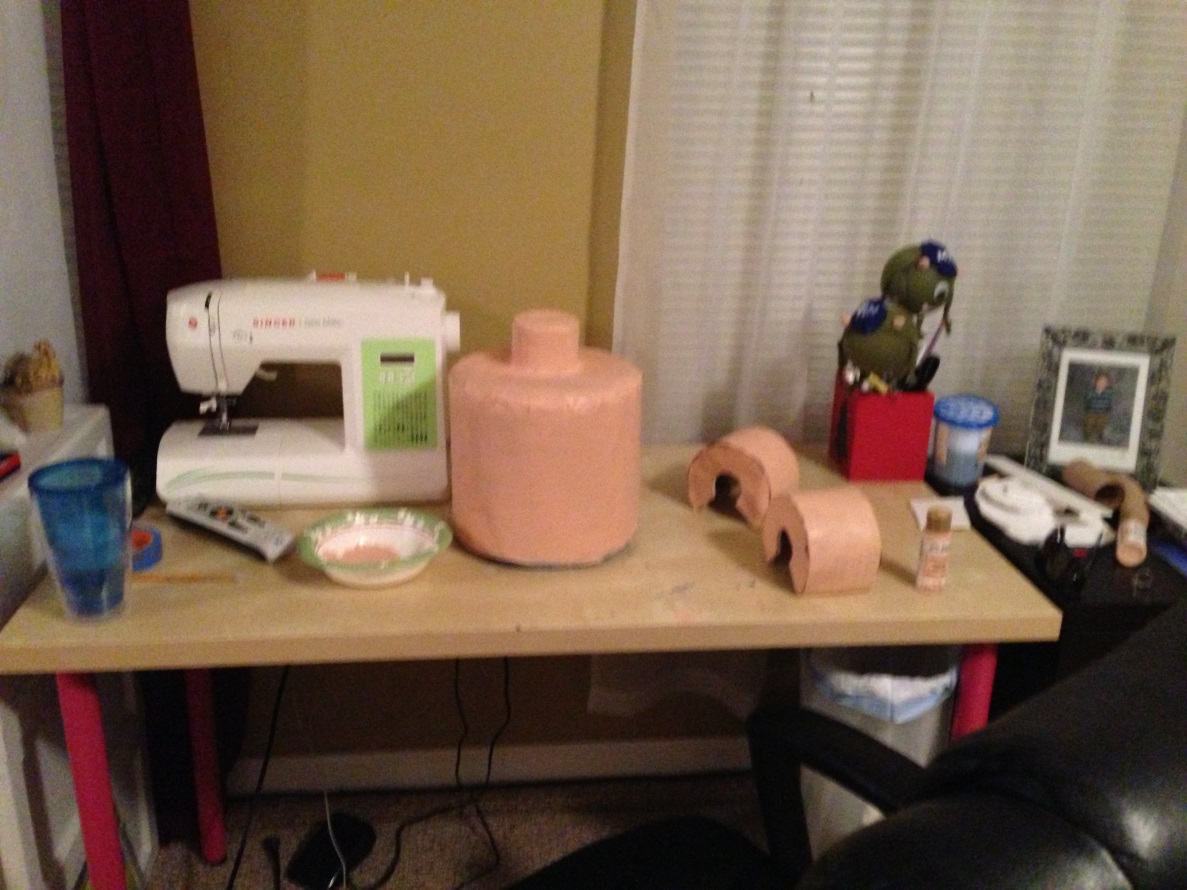
1. Determine the correct size circle for your child’s hand. I compared their hands to my kitchen bowls and saw which one would fit their hands comfortably while still covering them completely. The largest bowl was approximately 6” across.
2. First cut four circles from either your cardboard or foam board. My older child did well with the cardboard, my younger child needed the foam board or his hands would have been destroyed. Then cut a smaller circle directly in the middle of your circles. I chose a bowl approximately 3” across to trace. Cut straight across the circle edge that is left to form the “C” of the hand.
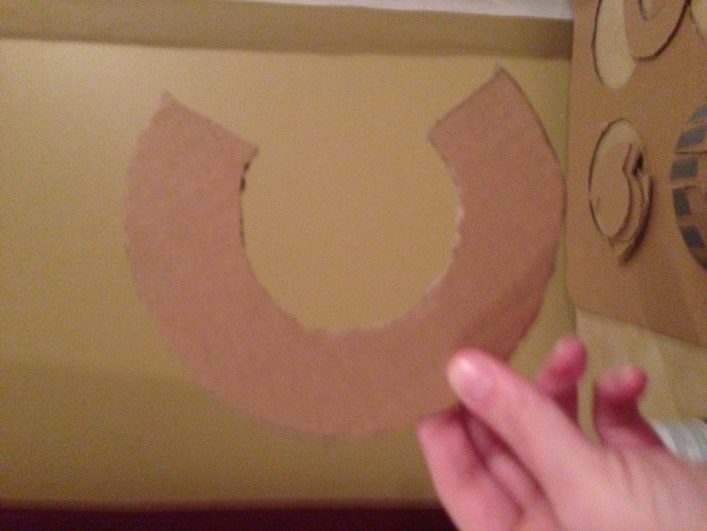
3. Trace this “C” shape 4 times onto your butcher paper before continuing. You can trace a few extras just in case.
4. Cut 1 inch strips of cardboard or foam board, 4 inches long each. Attach these to the “C” form starting on one end and working to the other.
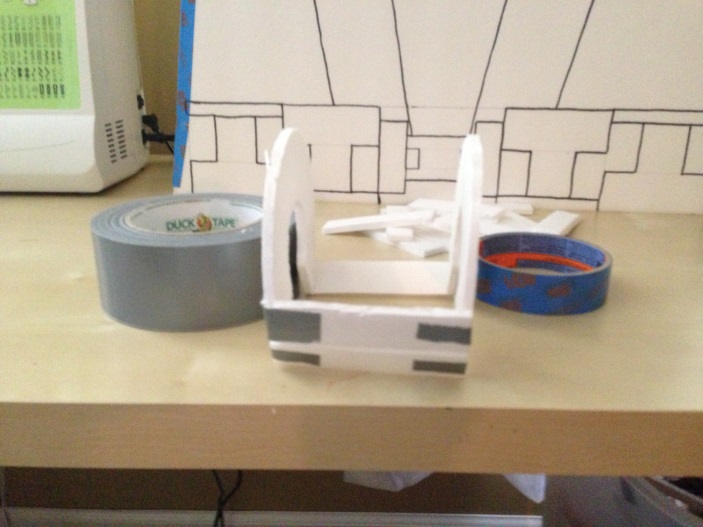

5. Cut 4 inch strips of butcher paper to cover the outside of the hand. Attach to the outside of your hand with painters tape. Tape your “C” pieces of butcher paper to the sides of the hand. Secure in place with painters tape. Paint your desired colored to match your Lego Costume.
6. Cut a hole in the top of the hand using an X-acto knife. It should leave approximately ½” on each side of the hand. Cut it large enough for your child to insert their hands but not so large they hands fall of easily.