
Lego Costume- Legs
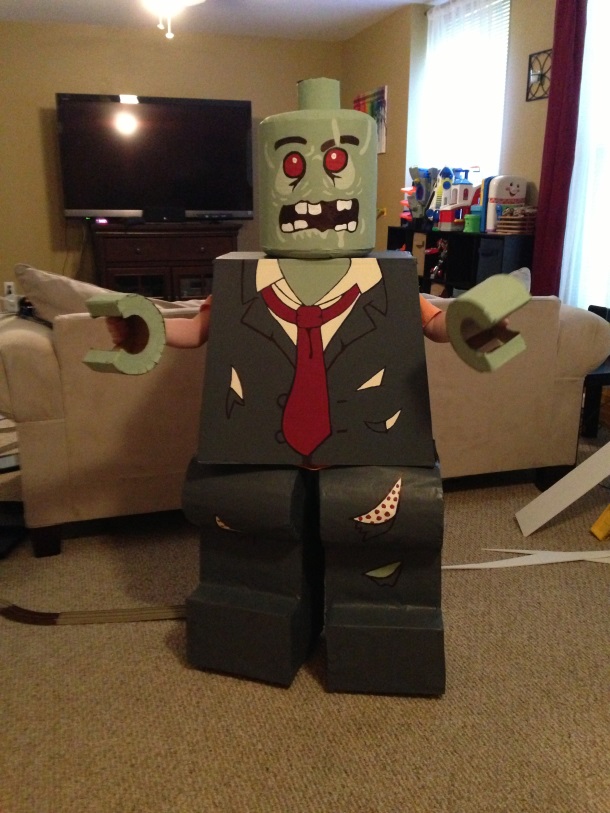
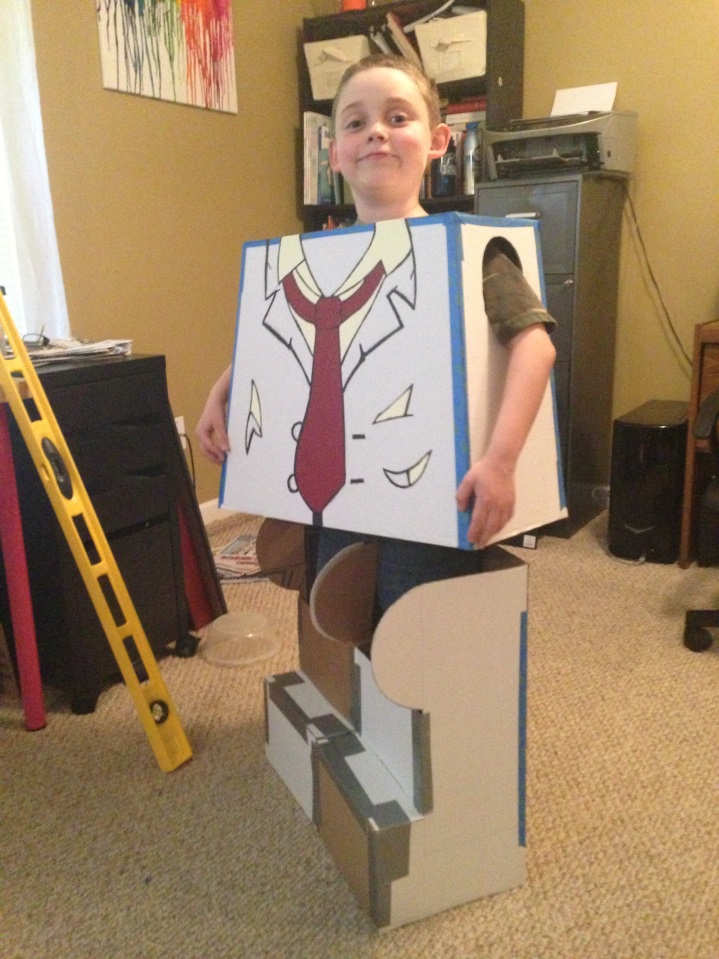
I am going to start this tutorial by saying that I definitely wished I had made the legs differently. The biggest issue with the legs I made was my son’s mobility for trick or treating. I made legs that looked like Lego legs, without a thought of how well they would function at Trick-Or-Treat time. Throughout this blog you will find pictures of how I made the legs, along with comments about what I would do differently in the future. My older son eventually took the legs off and walked around with just the top of the body on. My younger son I never made legs for his costume and that was a smart decision. He was much happier with just the top of the Lego man and easy, free movement through the night.
Materials:
-Cardboard
-Duct Tape
-Painters Tape
-Brown Butcher Paper
-Paint
-Xacto Knife
1. Measure the bottom of your child’s Lego costume. This measurement should be the widest part of your Lego leg hump. I set about making each leg separately and without this measurement. I also made the hump separately on each leg. My suggestion to you is to make one solid Lego hump and use suspenders to keep it at your child’s waist. The construction of the hump will be the same as my pictures just cut long enough pieces as to accommodate the whole length of your child’s costume. SEE INSERTED DOCUMENT FOR FULL PATTERN AND DIAGRAMS OF NEW STYLE OF LEG!
2. Cut 1” strips of cardboard to the length measured in step 1. It took 10 to get up my hump piece but cut extra if you’re making it for a bigger child.
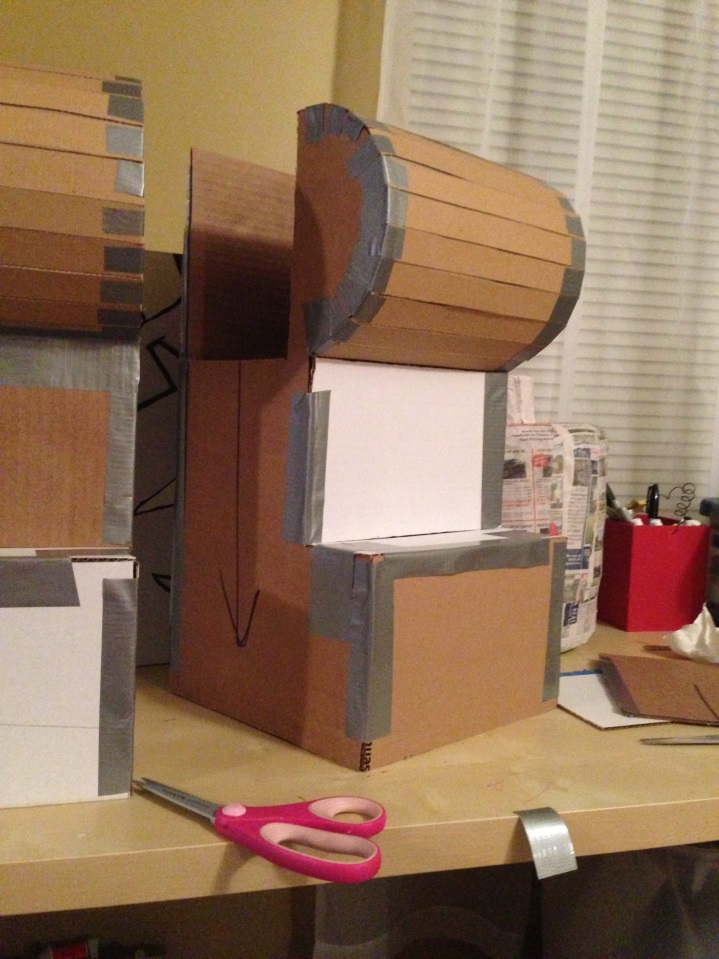
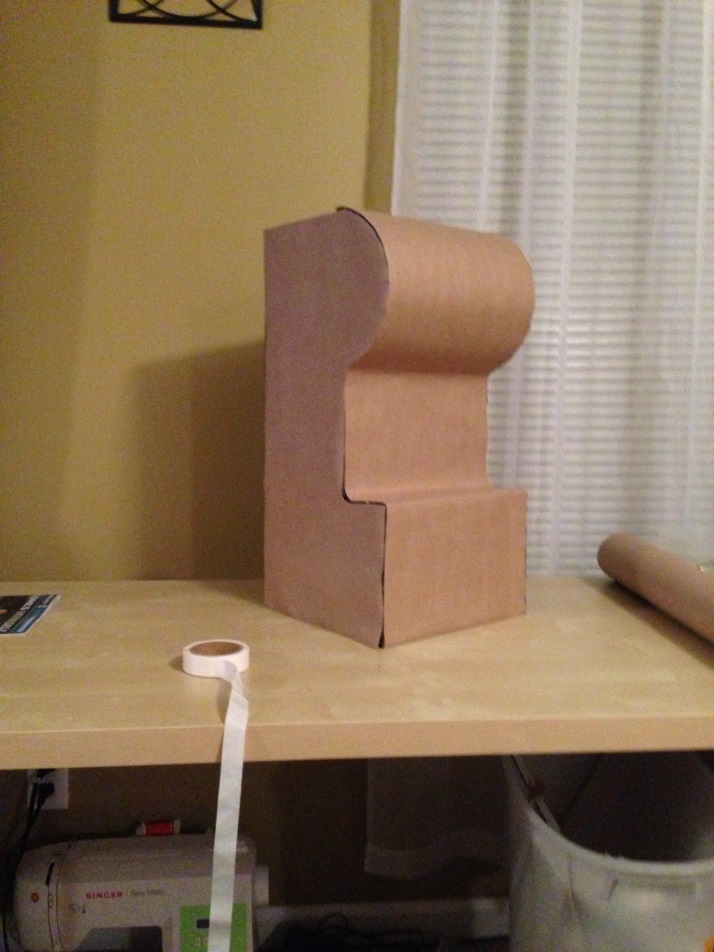
3. Make the hump by cutting out a piece of cardboard the same of a half circle on top of a square. I searched for the bowl in my cabinet that looked proportionate to my child’s costume and traced half of it. The square portion should be just as wide as the body you already constructed and as deep as your corresponding bowl half. Trace this piece on butcher paper twice.
4. I made the mistake of continuing down the leg and foot. My child had ZERO knee flexibility and was forced to march straight legged everywhere before eventually giving up and taking the legs off. If you wish to continue, as I did, make sure it is an older child that understands how he will have to walk in the suit. If you wish to make legs all in one piece you simply continue down the length of your child’s leg and add a proportionate foot area in the bottom. Trace this piece onto butcher paper twice.
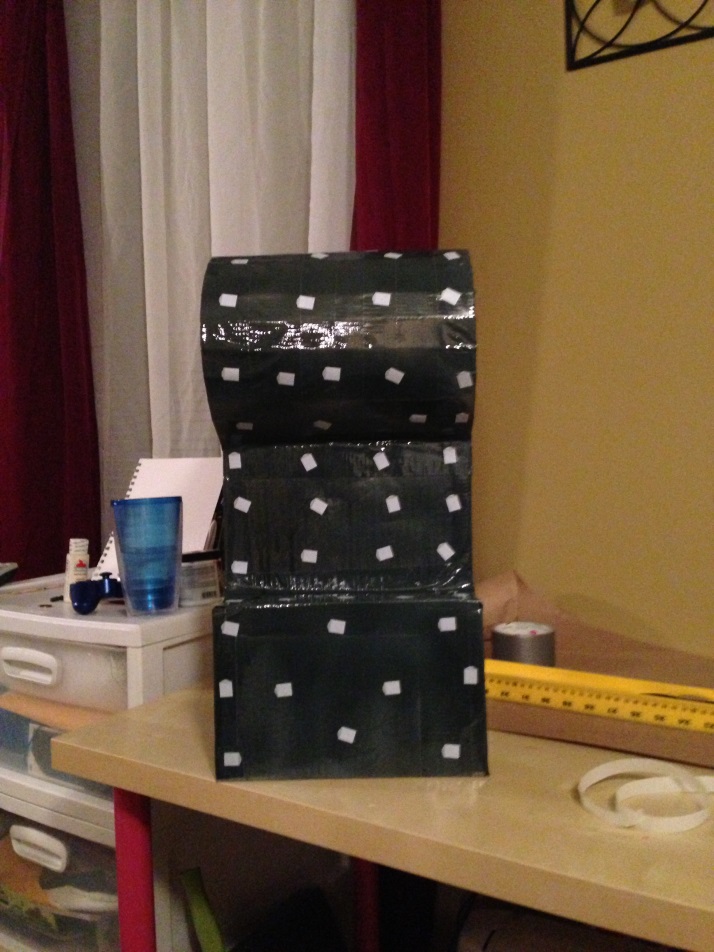
5. Attach 1” strips to the half circle part of your leg side. I attached them with duct tape for a more secure feel.

6. Cover hump fronts completely in duct tape. This will bind the strips together while maintaining the curve of the Lego costume piece.
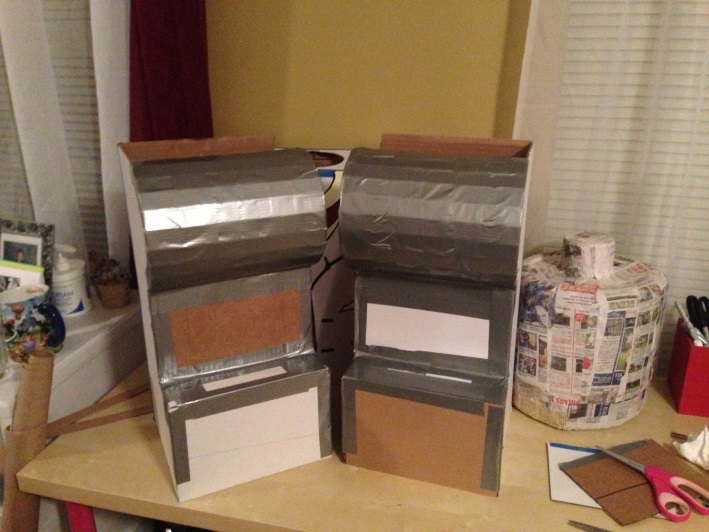
7. Measure your child barefoot from the floor to just below the knee. Use this measurement to cut out the leg and foot cardboard piece. The leg should again be as wide as the body and upper part of the hump. The foot section should be at least should be a minimum of 4” to accommodate shoes while wearing the costume. Pay attention to proportions and adjust as needed. Cut out 4 pieces for both leg sides. Compare the sides to your child’s leg before continuing. Trace this piece 4 times onto butcher paper.
8. The front and back of the leg are again determined by your child’s proportions. Measure the front of the body section of your costume. Subtract and inch from this measurement and divide this number by two. This will be how wide each leg will be. Cut 4 pieces at this length: one for the front of the foot, one for the top of the foot, one for the front of the leg and one for the back of the leg.
9. Use duct tape to secure each piece all the way up the leg, securing all the seams. For extra support, use duct tape on both the inside and outside of the leg pieces. Set up the pieces again and make sure your proportions are still looking good. Your proportions will be a little different from mine, due to the retooling of the instructions.

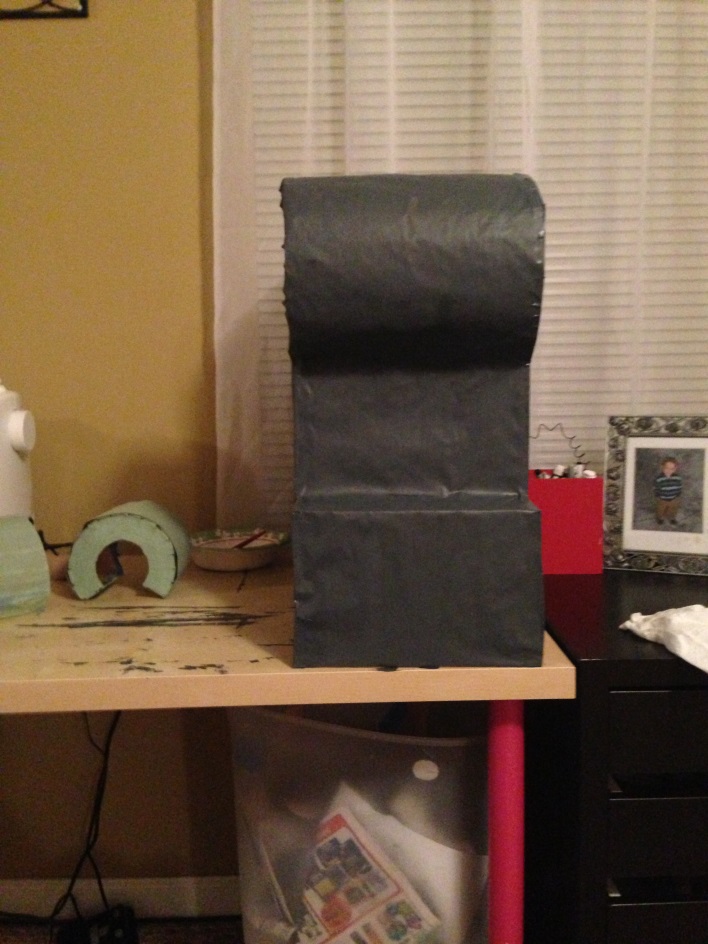
10. Cut out your traced pieces of butcher paper. Cut 4 long strips of butcher paper the same width as the front and back of your leg pieces. Attach butcher paper to all sides of the legs, you can attach with mounting squares or painters tape. Using the long strips of butcher paper, cover the front of each leg and cut off excess and then repeat for the back of the leg. Seal seams with painters tape.
11. Paint your leg pieces to match your costume theme. Since you are hopefully making 2 separate leg pieces make sure you have coordinating pants before deciding on a leg paint color. That way your costume still looks seamless.
12. Your costume is now complete! Select your pants and shirt before painting so you have a polished look when you are done. Gather any needed accessories and voila! You have yourself a Lego person.
Enjoy!