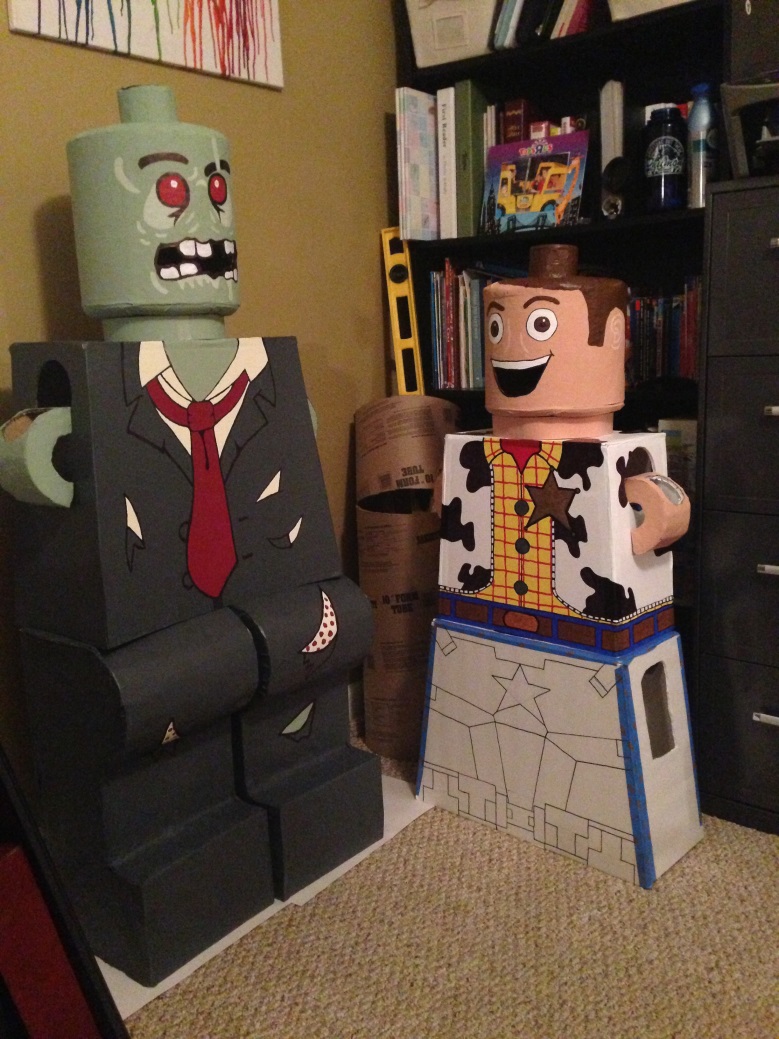
Lego Costume Head
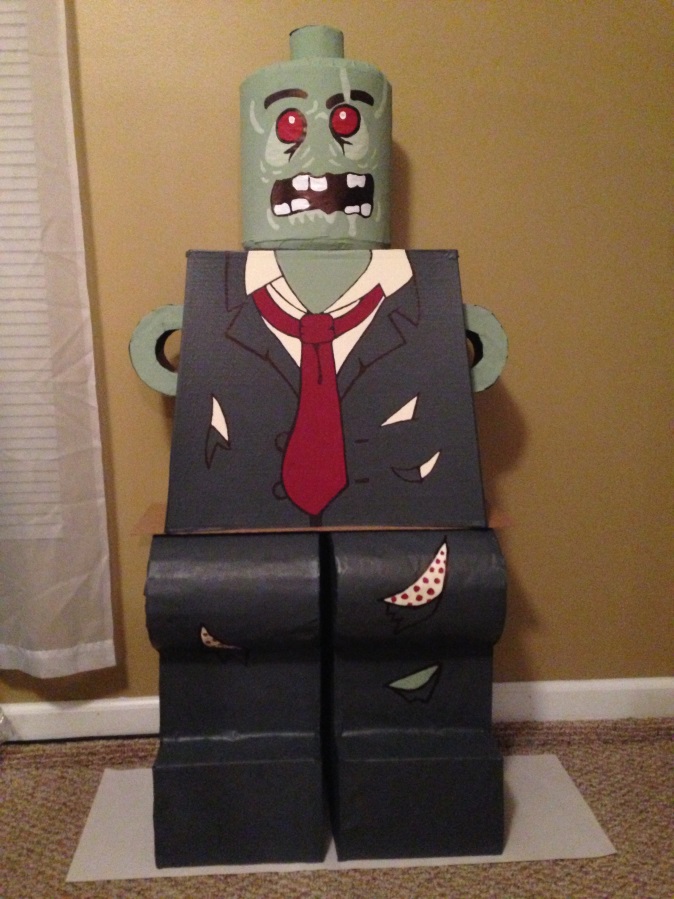
This costume has many parts so I will be breaking apart each part into separate posts. I am going to start with the head and then we will work down the body. This can be customized with any Lego figure head you want. Here is how to get the foundation of the Lego head into place so you can start to build your costume. I have some trial and errors I did in trying to figure this out. I will share in case you don’t have the budget or tools to do it my final way.
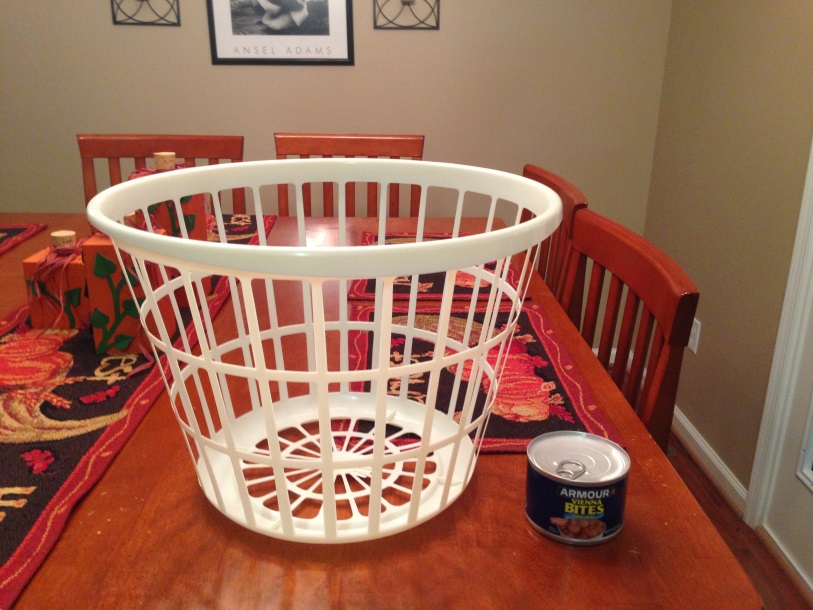
Materials:
-Quickrete tube
-Painters or masking tape
-Dollar Tree laundry baskets
-Small can (I bought Vienna Armour Sausages)
-Brown butcher paper
-Xacto Knife
-Paint
-Hacksaw
1. I purchased a 10” quickrete tube from my local hardware store. I measured my son’s head from top to an inch below his chin and then added 2 inches. I drew a line on the quickrete tube corresponding to this measurement. Cut the quickrete tube with the hacksaw. Once the tube is cut I rested it on my son’s shoulders and made sure it didn’t look too tall or disproportionate. If you need to make adjustments now is the time to cut off more to shrink it or cut a new piece if you need it larger.
2. Take your small laundry basket, I always get these at Dollar Tree and they’ve been very handy for projects, cut off the bottom of the basket. You’re cutting right where the basket openings stop and leaving the bottom and curved part leading up to the openings intact.
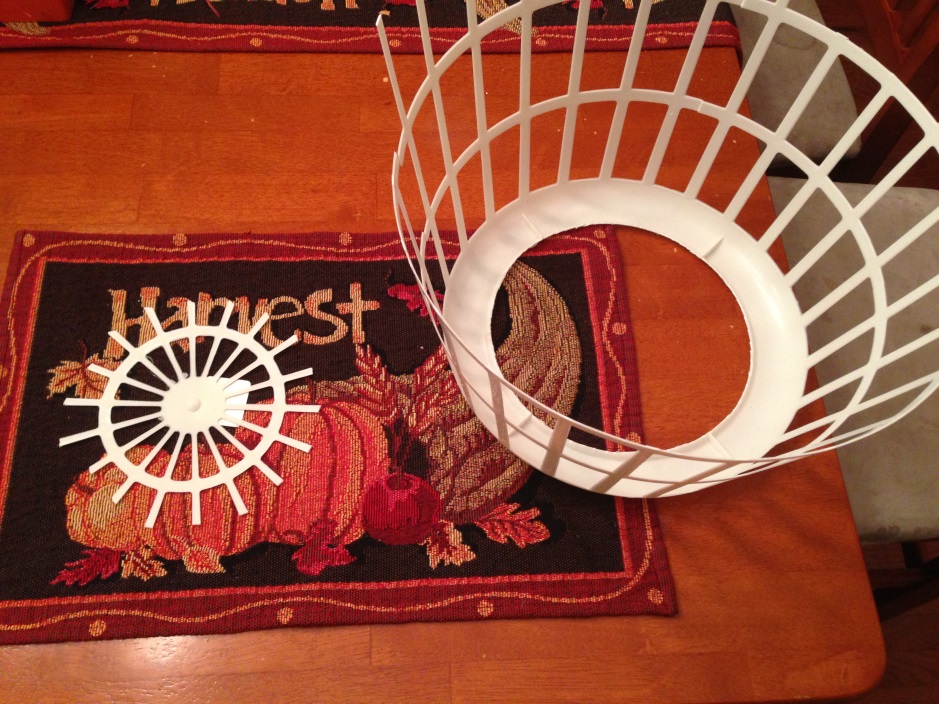
This is one of my earlier tries, keep the middle part intact and keep the rounded bottom up to where the openings begin. I cut it with diagonal cutters but the Xaction knife or scissors will work.
3. I taped this to the top of the to the top of the quickrete tube and then taped the can to that.

If your basket is not going in perfectly you can cut it into pizza wedges. Tape them pretty close to each other on the edge of the tube and then layer with painter tape. I had to put a cardboard circle on top to help support the weight of my empty can and give the pizza slices stability.
4. Repeat on the bottom with just the curved bottom pieces to leave and opening for their head but to finish off the rounded Lego head look. Make sure before you continue that it will actually fit on your child’s head. If their head needs a bigger opening then slowly shave off the basket from the middle of the opening until it fits. Make sure to leave some of that rounded edge to finish the look. If your child’s head really needs all 10” of quickrete tube that’s ok, just leave the basket off all together.
5. Cover the head with butcher paper to smooth out any line and give you a good painting surface.
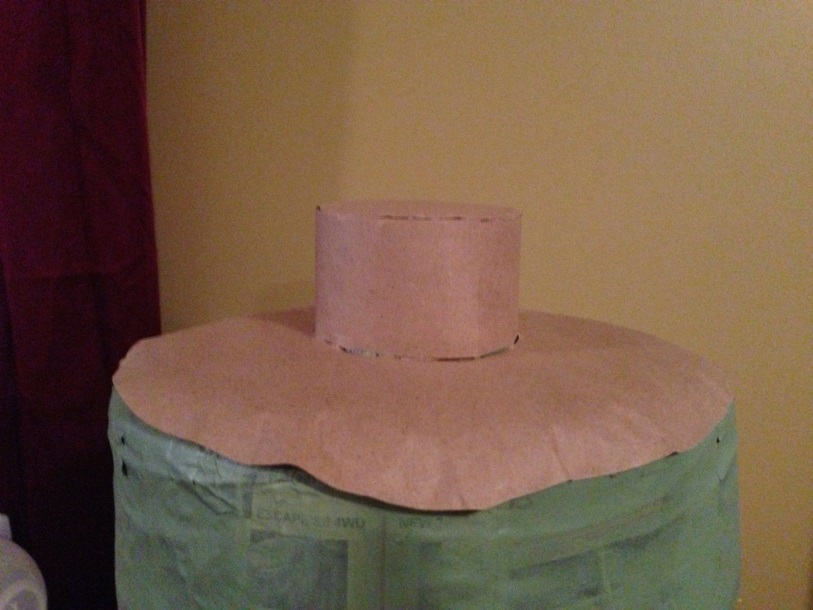
Hang your paper down just a bit to cover with the paper on the side of the head. I cut a circle for the top of the can and a straight strip for the side of the cans.
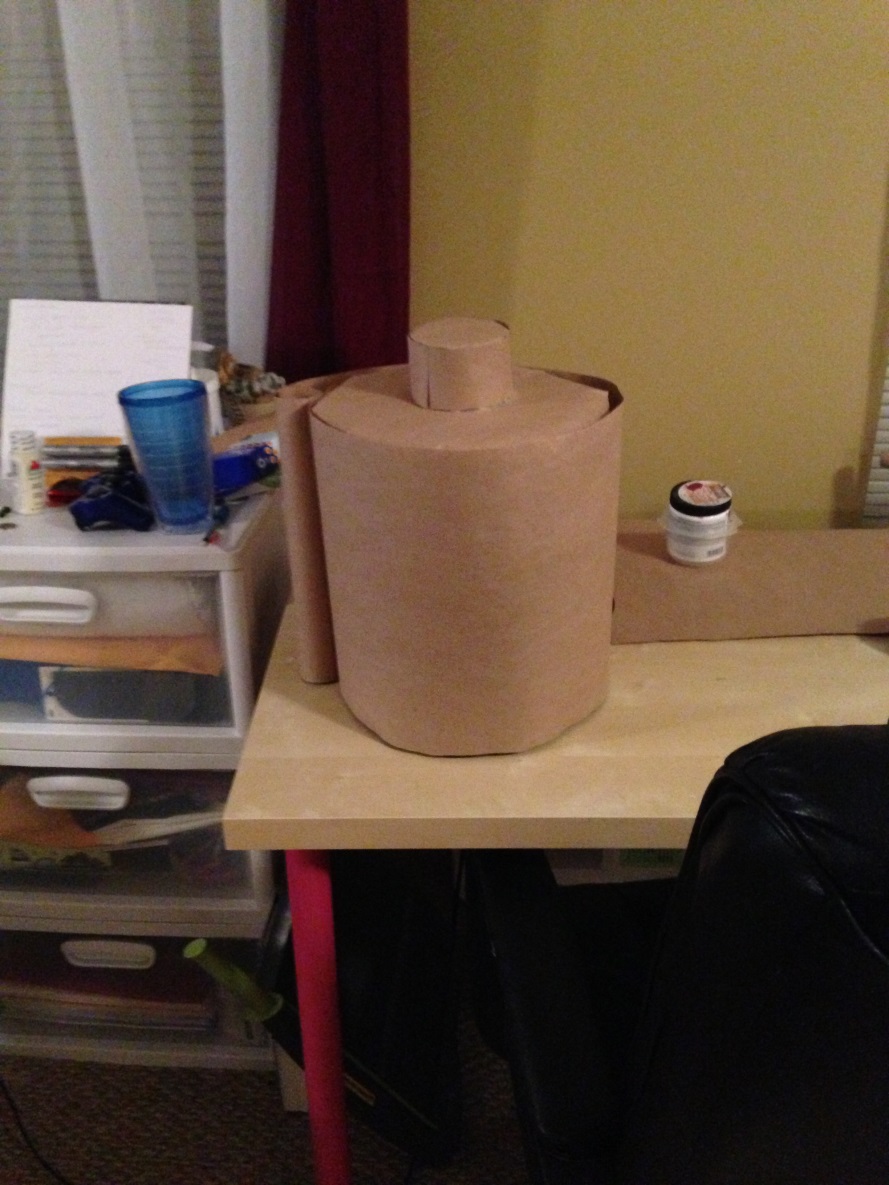
Use painter/masking tape on any seams you need to seal. I made the mistake of using duct tape- it does not paint well.
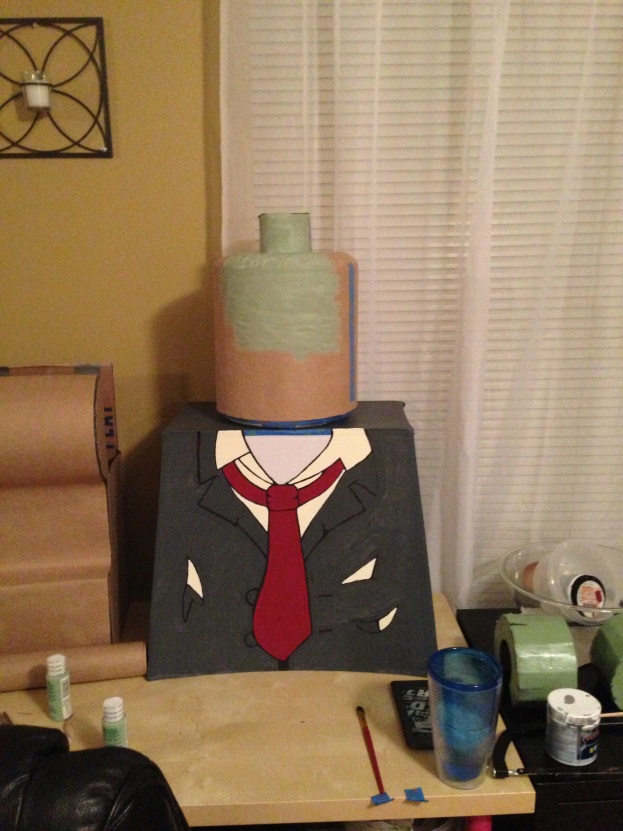
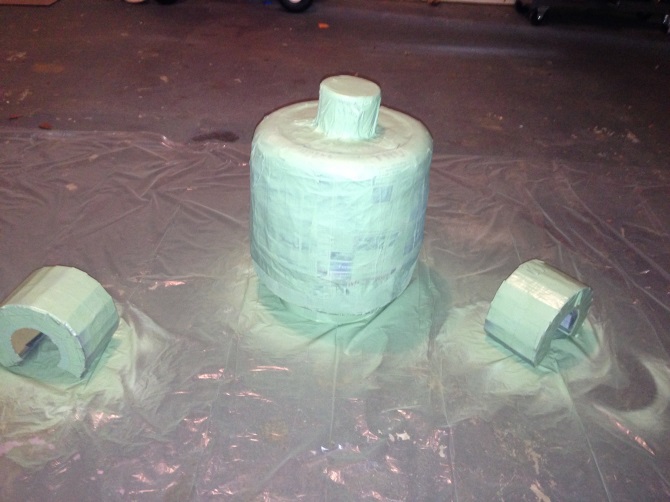
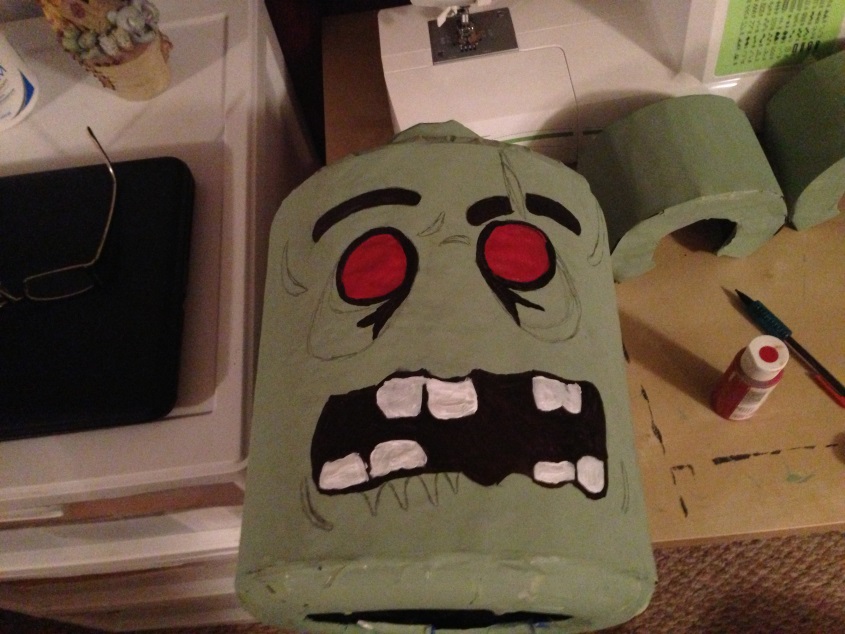
6. Paint your head base color, in my case it is green for the zombie, but yellow for normal Lego people.
I used a paint brush and brushed the paint on. It worked better then when I tried to spray paint the original head.
The spray paint didn’t cover as well and it was splotchy.
7. Draw on your face.
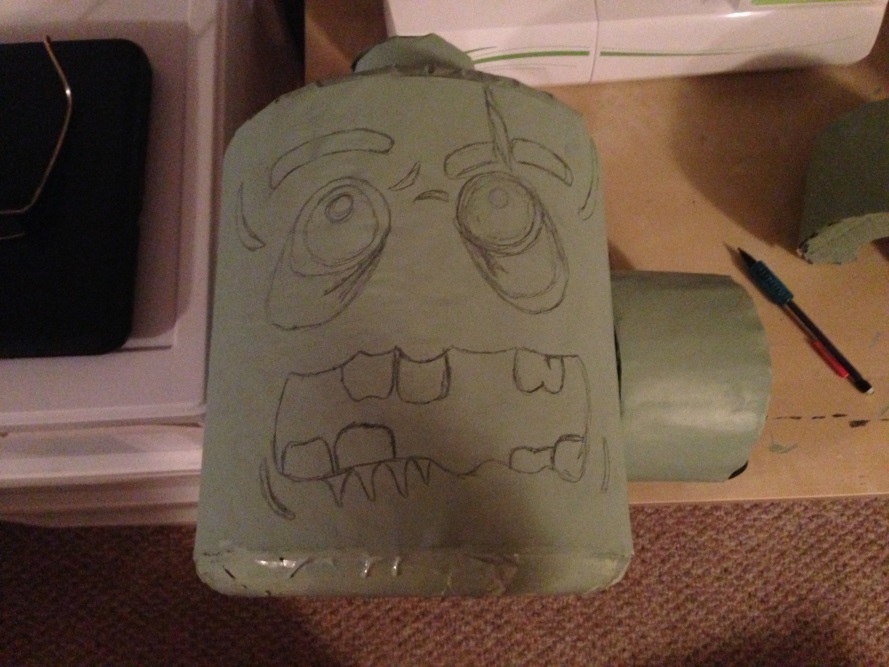
I free handed a face on. If you do not feel comfortable free handing, you could also find a coloring sheet with a face you like, enlarge the picture to the appropriate size and transfer the image with tracing paper.
8. Paint in the features on the face. After I finish painting I outline everything with a Sharpie marker.
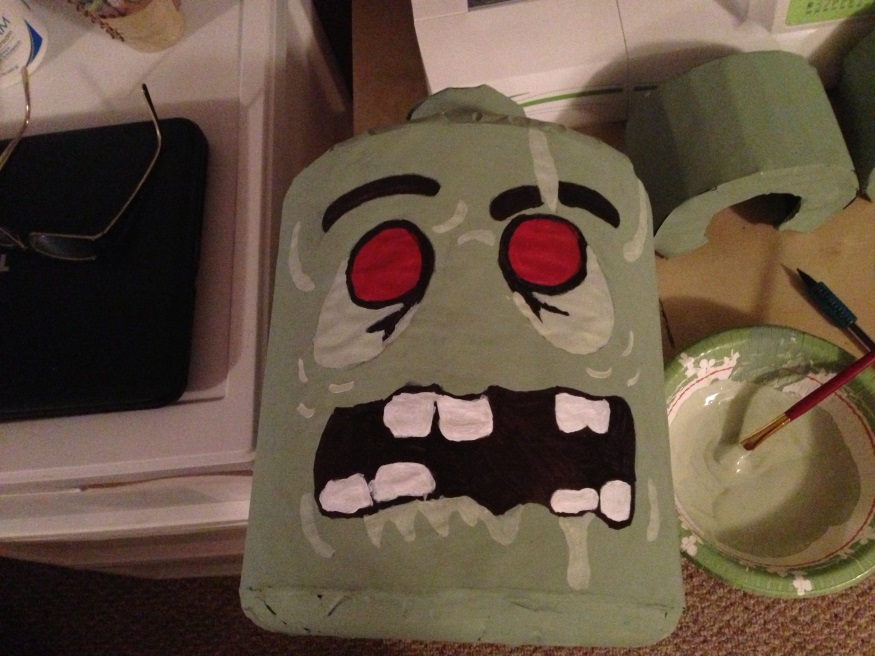

9. I cut out the mouth around the teeth to give my son eyeholes. This allowed me to see how much neck I needed to add so he could see through the Lego head. The neck is made of card stock an inch thick and taped to the bottom of the head on the inside. I painted the neck to match the head.