Monster Trio
Materials:
– 2×4 Lumber
– Paint (I purchased all Apple Barrel brand paint: Black, White, Bright Yellow, Spiced Carrot, Vanilla Ice Cream, Sublime Lime, New Shamrock, Pewter Gray, Green and Princess Purple or Concord Grape)
– Halloween Scrapbook Paper
– Mod Podge and brayer if using scrap book paper instead of letters
– Vinyl letters or sharpie marker
– Fake Leaf
– Wine Cork
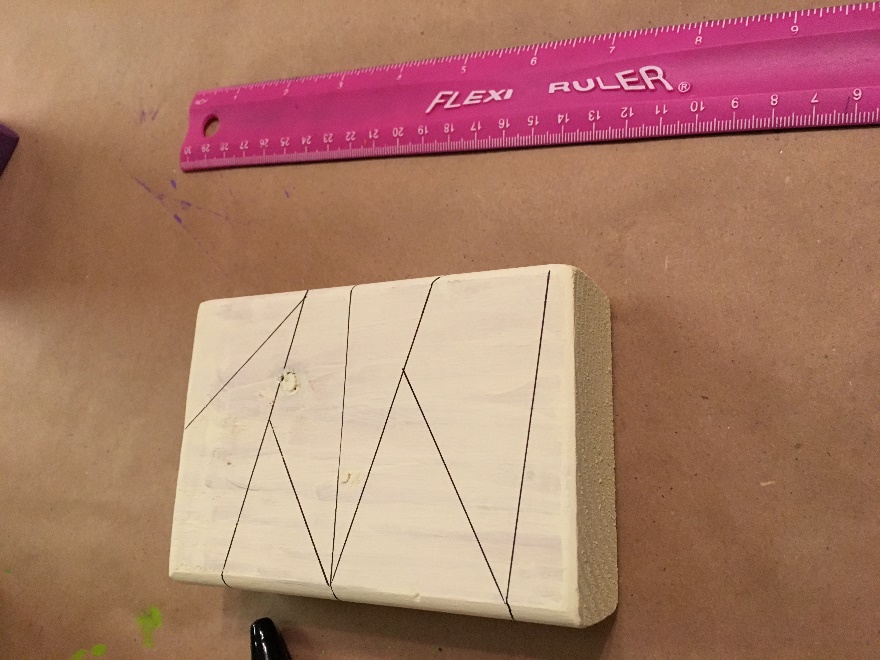
– Ruler
– Sharpie Marker
– Fine Tipped Sharpie Marker
-Craft Glue
1. Cut 2×4 lumber into 3, 5, 7, and 9 inch blocks of wood.
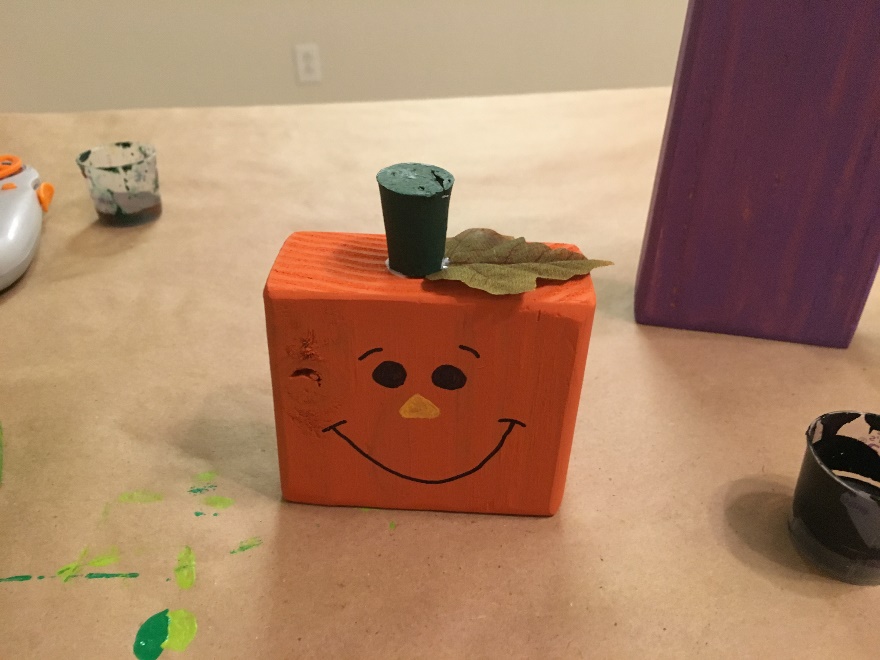
2. Paint 3” piece of wood with Spiced Carrot orange paint.
3. Paint 5” piece of wood with Vanilla Ice Cream off-white color.
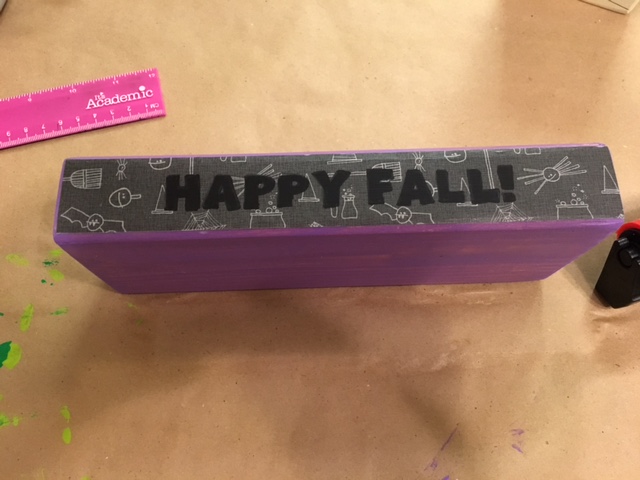
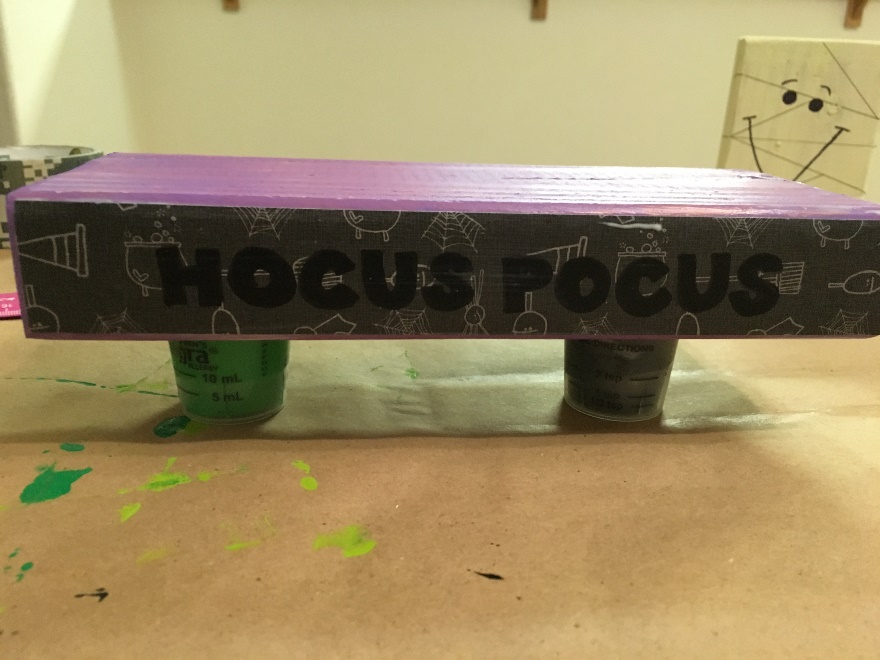
4. Paint 9” piece of wood purple. I’ve used Princess Purple and Concord Grape at different times and liked both.
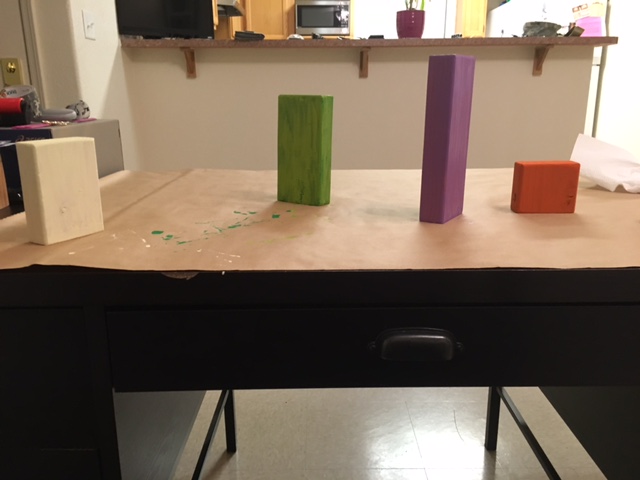
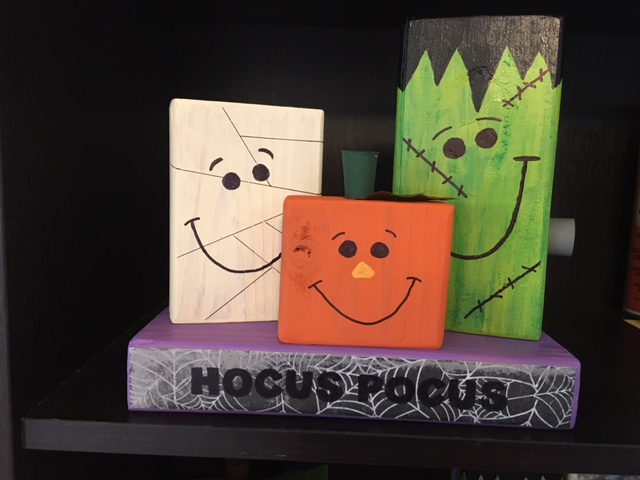
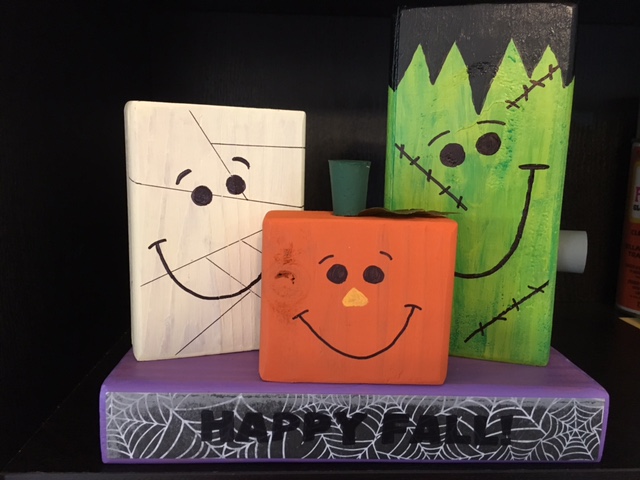
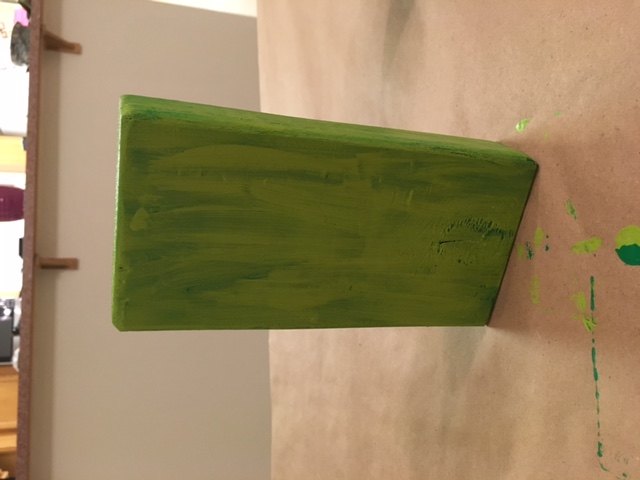
5. For the Frankenstein 7” block, paint your New Shamrock green color first covering the entire block. Then immediately while the paint is still wet, brush on Sublime Lime green color to slightly mix it and get the streaked affect.
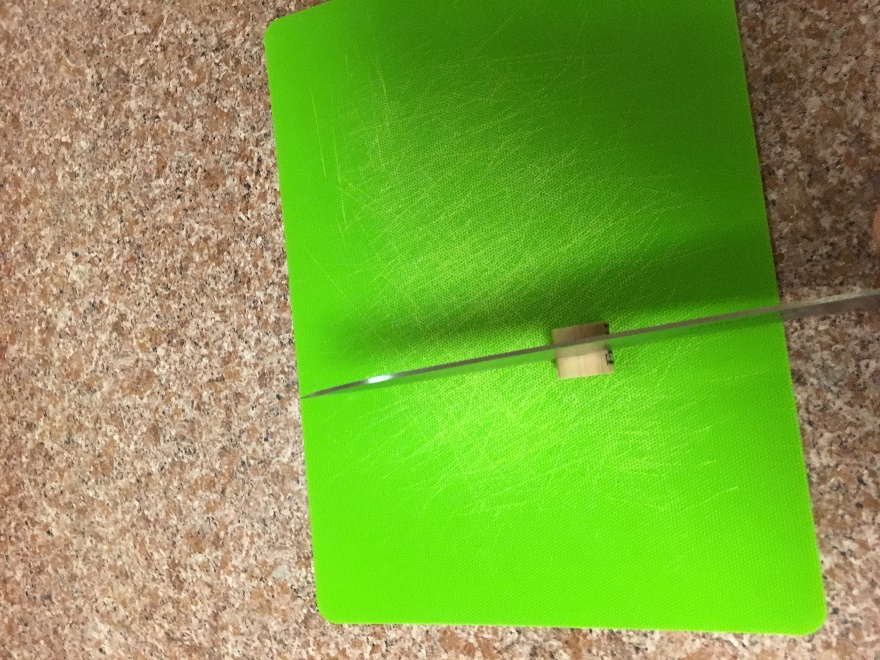
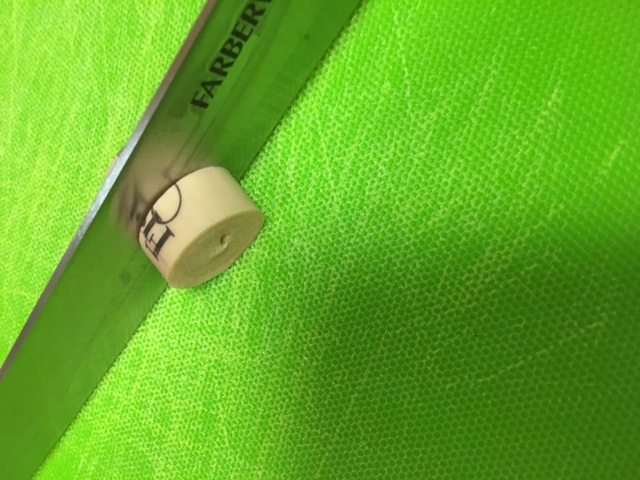
6. Cut wine corks for Frankenstein’s neck bolts. I cut them into approximately ¼” widths.

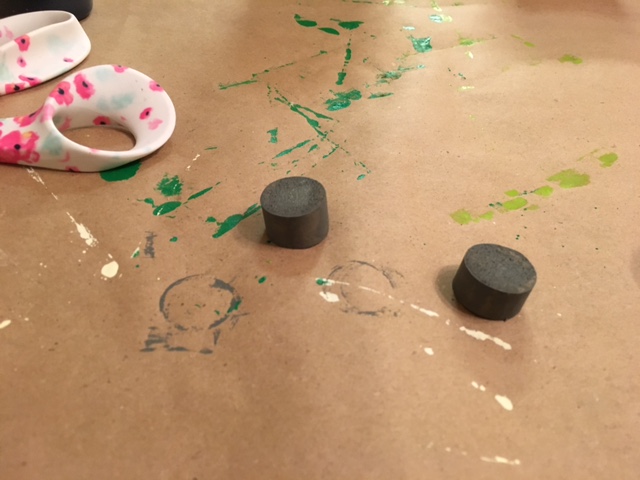
7. Paint them with the pewter gray paint.
8. Paint pumpkin wine cork if desired, you can paint it green or leave it the cork color. If you have purchased a fluted cork this is an option. If it’s from a wine bottle, you’ll have to paint it to cover the lettering on the cork. You can use only one cork if it is from a wine bottle: half for the Frankenstein bolts and half for the pumpkin stem.
9. Draw lines on off white block of wood. I used a fine tipped sharpie marker and a ruler. The idea is to create the illusion of mummy bandages.
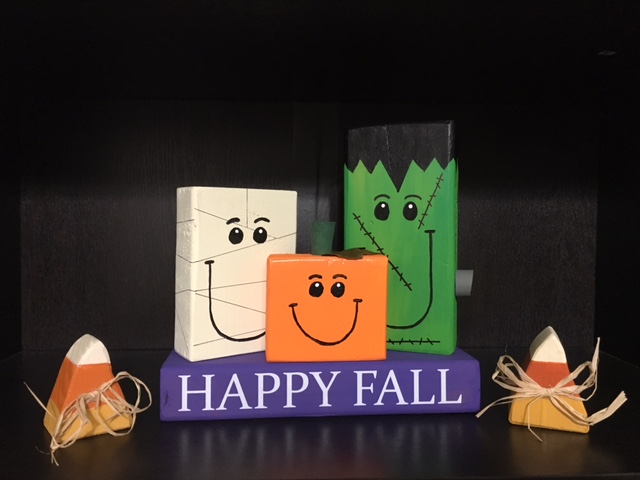
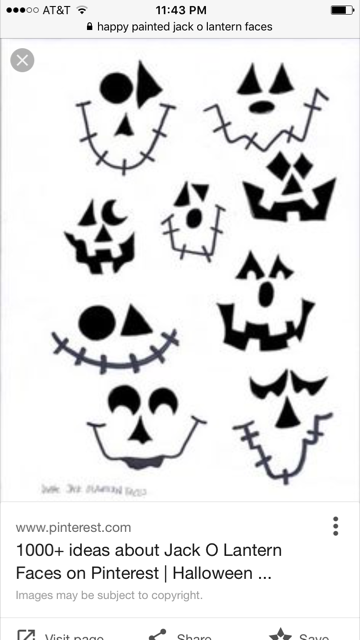
10. Paint faces on each monster. It’s mostly dots, eyebrows and a smile. If you don’t feel comfortable hand drawing faces, I’ve included a picture of potential faces you can transfer with transfer paper. Make sure to size correctly in word before transferring.
11. For the 7” Frankenstein block, draw out hair and scars at this time. You can measure on starting dots for the hair spikes if you want an even look or free hand them on. I do the faces and hair in fine tipped marker first to make sure I have the proportions right and look I want.

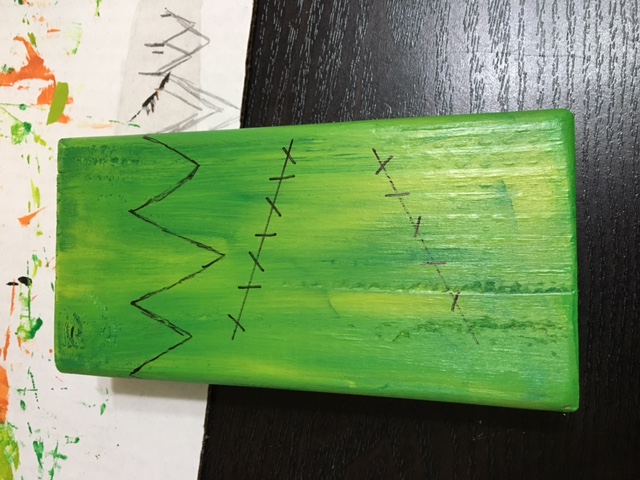
12. Trace over your lines with sharpie marker. Paint in Frankenstein’s hair with black paint. Fill in each monster’s eyes with the same black paint. Add a yellow triangle for your pumpkin’s nose if desired.
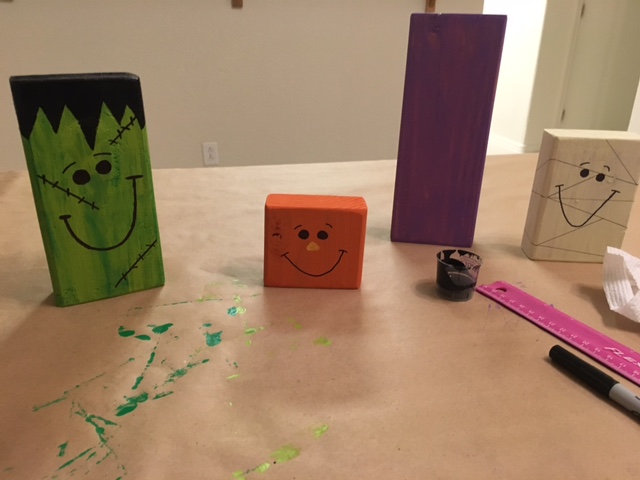
13. Glue on leaf and wine cork to pumpkin using craft glue. Make sure to press down firmly so the cork adheres and not just the leaf to the top of the wooden block.
14. The purple block has a few options. For the first few I traced “Happy Fall” and “Hocus Pocus” on two 1” x 8 ¾” piece of scrapbook paper. Instructions for the best way to trace letters onto scrapbook paper can be found in my previous post “Falling Leaves Wood Blocks”. Then I used Mod Podge to adhere them to the front and back of the wooden block. This allows the bottom block to be reversible and give it a fun Halloween look. The other time I cut out 1” letters out of vinyl and just let it say Happy Fall. You can use a combination of the two or change the sayings as well.
15. Take a ball straight head pin and dab it in white paint. Add little white dots to each monster’s eyes.
16. Stack the blocks laying the purple block down flat first, then add the monster trio to the top standing up. Enjoy and Happy Crafting!